This blog will show you how to add a button to the form. This is a bit of smoke and mirrors really as we'll made a CRM attribute to appear to be button. The finished result looks like this:

The following steps will guide you through how the above was achieved:
1. Add a new text attribute to your entity, for this example it was called new_button. I set the maximum text length to 5, but the length is unimportant to this functionality.
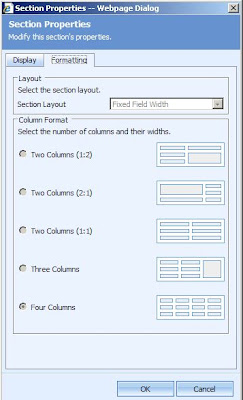
2. Add a new section to the form, change the section formatting to 4 columns.

3. Add the new text attribute (new_button) to the new section that's just been created.
4. Change the Field Properties for new_button and ensure that Display Label on Form is un-checked.

5. The next step is to make the text-box look like a button, add the following to the form onLoad :
//Define the button style
var buttonStyle="font-family: Tahoma; font-size: 11px; line-height: 18px; height: 20px; width: 84px; text-align: center; cursor: pointer; border: 1px #3366CC solid; background-color: #CEE7FF; background-image: url('/_imgs/btn_rest.gif'); background-repeat: repeat-x; border: 1px #3366CC solid; padding-left: 5px; padding-right: 5px;";

//Set the style
crmForm.all.new_button.style.cssText=buttonStyle;
6. Now we need to set the button text:
//Set the button text, and don't allow it to be edited
crmForm.all.new_button.DataValue="Upload";
crmForm.all.new_button.contentEditable = false;
7. Finally the button needs to do something so we'll add the following:
//Define what the button is going to do
buttonClicked = function()
{
alert("Upload process started");
}

//Set the button's on-click event
crmForm.all.new_button.attachEvent("onclick",buttonClicked);
The above example will work for CRM 3.0 as well but you'll need to change the style to make it fit in.
As of version 4.0.10 the SDK provided stylesheets to allow any custom development to match the CRM look and feel. Download the SDK here. Once unpacked look at the sdk\stylesheet folder details.
No comments:
Post a Comment